Besides Advanced settings available in the interface, DocuFreezer has many attributes in the Ini File Editor, which can help you thoroughly tweak your file conversion process: set custom filenames, specify languages for OCR, reduce the size of output files, skip certain files by mask, and more.
To configure in-depth file conversion settings, you need to change the value of a particular line of this Ini File Editor. This way, you will enable or disable a feature or option manually. Some of them are not in the GUI yet and can be found only here.

Use with caution!
Changing these settings may affect DocuFreezer's stability and performance. You should only change them if you are sure of what you are doing. If you are not sure, please contact our support for assistance. Our specialists will help you make the right settings specifically for your task.
Opening and editing the Ini File Settings
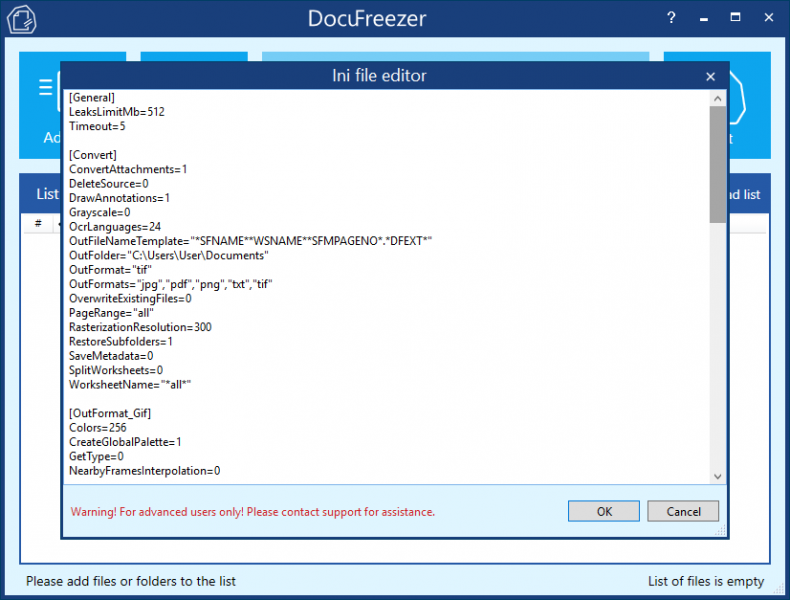
To open the Ini File Editor, open DocuFreezer and press Ctrl + Alt + i on your keyboard. You will see this window:
In-depth options in the Ini File Editor
The Ini File Editor has lines (entries) with attributes arranged into sections, e.g., [General]. Each line contains settings that control a specific parameter of DocuFreezer's functioning. You can use Ctrl + F combination to find a particular line quickly.
Lines & Values
[Convert]
DeleteSource=0
Specifies whether original input (source) files should be deleted or not after conversion
1 – Delete source files
0 – Keep source files
OcrLanguages=24
Defines which languages should be included for text recognition via OCR. OcrLanguages=24 is set by default (24 stands for English). You can change it to another language, depending on your file's contents:
24 = English
20 =German
40 = Hebrew
50 = Japanese
79 = Russian
85 = Spanish
21 = GermanFraktur
For example, if your documents' text is mainly in English and German, change this line to OcrLanguages=24,20. For the best OCR results, it's better not to set many languages at once (one or two is alright).
OutFileNameTemplate="*SFNAME**WSNAME**SFMPAGENO*.*DFEXT*"
Allows you to set a template for output files. You can change it by removing or swapping certain parts of this line:
*SFNAME* – Source file name
*WSNAME* – Worksheet name (for CAD, Excel files only)
*SFMPAGENO* – Source file page number
*DFEXT* – Destination file extension
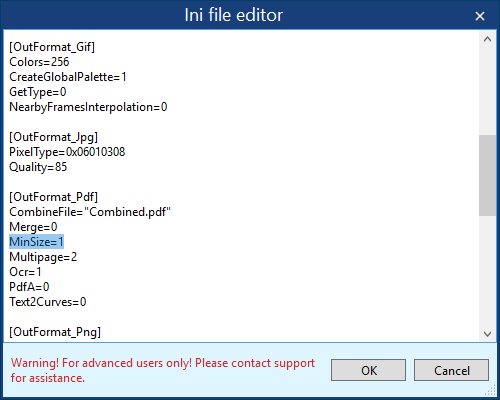
[OutFormat_Pdf]
MinSize=0
Reduce the output file size when converting Word documents (.doc, .docx) to the PDF format. With this feature enabled, the PDF files will get smaller approximately by 30%.
MinSize=1 – Enable MinSize feature
MinSize=0 – Disable MinSize feature

PdfA=0
This feature lets you switch from a "regular" PDF to PDF/A format. This format is often used for archival purposes since PDF/A files usually take less space than other types of PDF files.
PdfA=0 – Save files as PDF
PdfA=1 – Save files as PDF/A
Text2Curves=0
This feature lets you convert text characters into curves. This enables you to protect your document texts from being copied or edited since text characters are turned into image objects.
Text2Curves=0 – Keep text as is
Text2Curves=1 – Convert text into curves
Extras
How to arrange multiple pages on one sheet after conversion
You can also set up the program to arrange multiple document pages on a single sheet after conversion. For example, you can arrange six images on one TIFF file.
- Select TIFF as the output file format and Multipage: Merge to one TIFF;
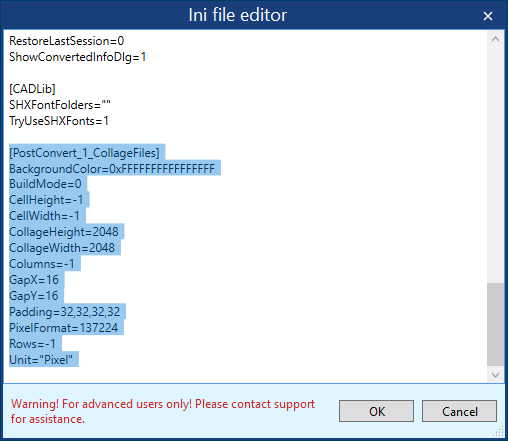
- Add these lines to the end of the Ini file editor:
[PostConvert_1_CollageFiles]
BackgroundColor=0xFFFFFFFFFFFFFFFF
BuildMode=0
CellHeight=-1
CellWidth=-1
CollageHeight=2048
CollageWidth=2048
Columns=-1
GapX=16
GapY=16
Padding=32,32,32,32
PixelFormat=137224
Rows=-1
Unit="Pixel"
- Click OK to save the Ini file editor settings.
- Add six files to the program's list and click Start.
This feature has many different parameters like rows and columns, etc., so it's better to contact our specialists so they can help you customize it to your tasks.
