When importing photos into your laptop or desktop PC, you might have seen .HEIC at the end of the file name. Opening these files might be troublesome on anything other than an iPhone or a Mac. HEIC is a newer image format that is not yet supported by all devices and software, so you can learn how to convert HEIC to JPG on a Windows PC in just a few mouse clicks. Let's find out how to quickly open, convert, and even print these files.

Contents
- HEIC to JPG offline converter for Windows
- How to convert HEIC to JPEG – step-by-step instruction
- Additional software required to process HEIC (HEIF) files: ImageMagick or HEIF and HEVC codecs
- Adjusting the quality of the output JPEG images
- Saving or removing EXIF metadata
- Batch print HEIC files with Print Conductor
- HEIC vs. JPEG
- How to view HEIC photos on a Windows computer
HEIC to JPG offline converter for Windows
DocuFreezer is a great tool if you're looking for an offline HEIC to JPG converter rather than an online service. It will help you save your images or documents as JPEG files (or PNG, TIFF, PDF) with just a few clicks. The software ensures flawless file conversion and high-quality output JPEG files. The files can also be compressed, watermarked, and renamed in batch mode.

How to convert HEIC to JPEG – step-by-step instruction

1. Install DocuFreezer and additional software on your computer;

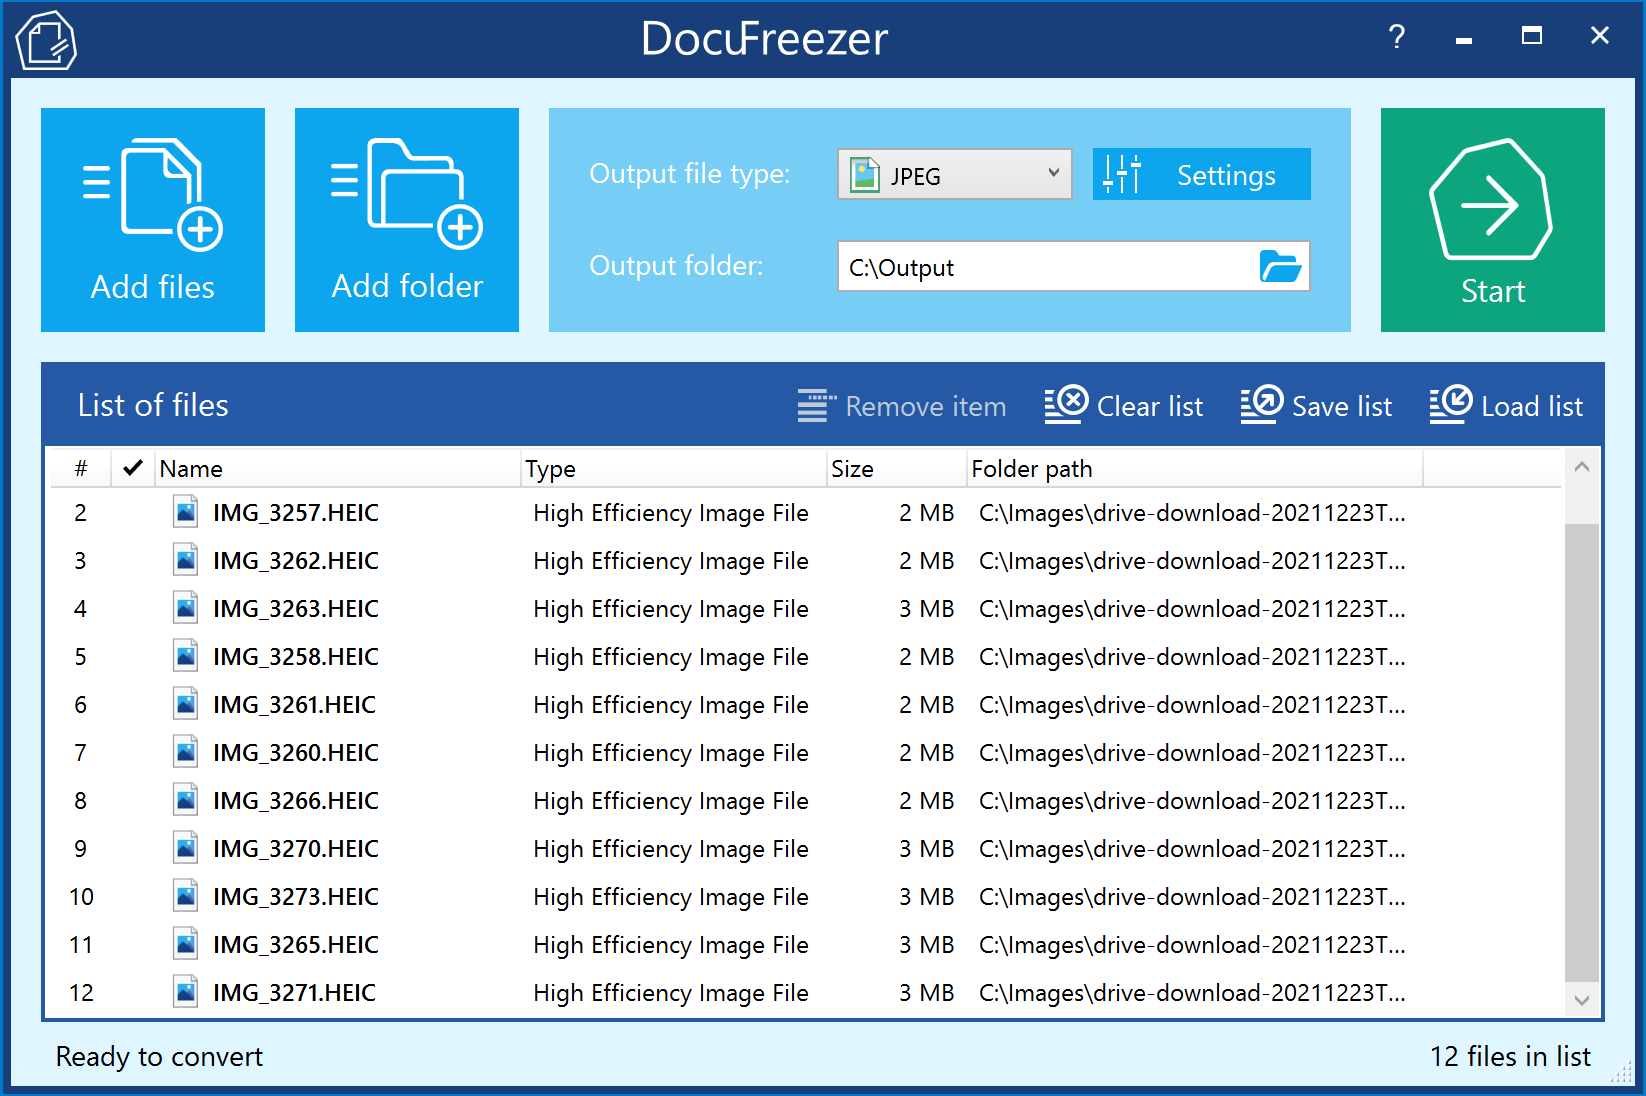
2. Open DocuFreezer and add files to the main window;
3. Select JPEG as output format;

4. Click the Start button.
The converted images will appear in the output folder quickly; it usually takes a few seconds but will depend on the number of files. DocuFreezer does not require Internet connection (unlike many file converters!). So if you have a couple of large photo albums to convert, it will save you a bit of bandwidth – you won't waste time or data uploading several megabytes or even gigabytes to the Internet.
Video instruction
Note: This video was created before the implementation of the option to install ImageMagick as additional software for processing HEIC files.
Advantages
| ✓ | Simple drag'n'drop interface |
| ✓ | Unlimited conversions per session |
| ✓ | Offline converter ensures your data is 100% secure |
| ✓ | Does not require Internet connection and does not affect your Internet data usage |
| ✓ | Allows converting multiple files in bulk rather than each file separately |
| ✓ | Can create optimized images out of digital photos to be uploaded to a website |
| ✓ | Can be used to create backup copies for archival purposes |
| ✓ | Allows to select output quality (25-100%) and other parameters |
| ✓ | Besides JPEG, supports other output formats: PDF, PNG, TIFF |
Features
| ✓ | Select JPEG compression mode: Baseline, Extended Sequential, Progressive, Lossless |
| ✓ | Select color space: CMYK, RGB, Grayscale, and more |
| ✓ | Rotate or auto-rotate to Portrait or Landscape |
| ✓ | Add text or logos as image or text watermark to protect the converted pictures |
| ✓ | Add post-processing actions: copy, move, delete, or rename |
Additional software required to process HEIC (HEIF) files: ImageMagick or HEIF and HEVC codecs
DocuFreezer supports HEIC as input file type (.heic, .heif) but it requires additional software to allow batch conversion. In order to process these filetypes, there are two options:
- Install ImageMagick (free)
- Install HEIF and HEVC codecs ($0.99)
Either option is usable. For instance, if you already have the HEIF and HEVC codecs, there's no need to install ImageMagick.
How to install ImageMagick
Go to https://imagemagick.org/script/download.php#windows and download the installation file. We suggest this one: ImageMagick-7.1.1-34-Q8-x64-dll.exe. Install the program by following the installation wizard.
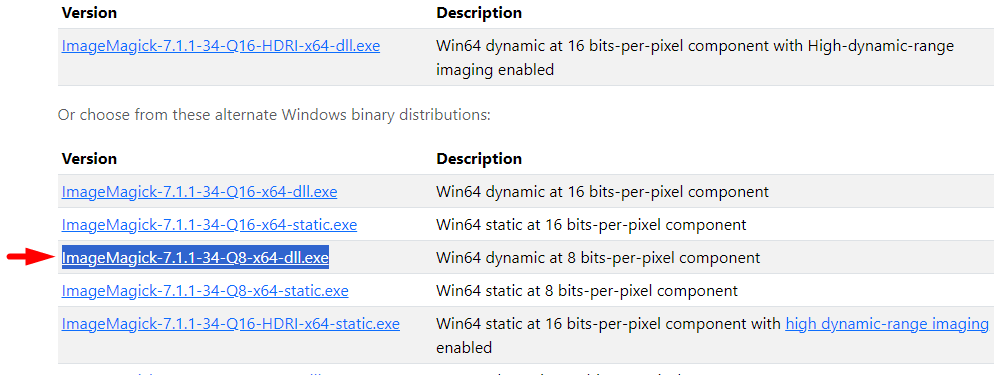
Note: Unlike the option with HEIF and HEIC codecs, this method doesn't require Windows 10/11. Therefore, if you have an older system, it's better to choose this method.
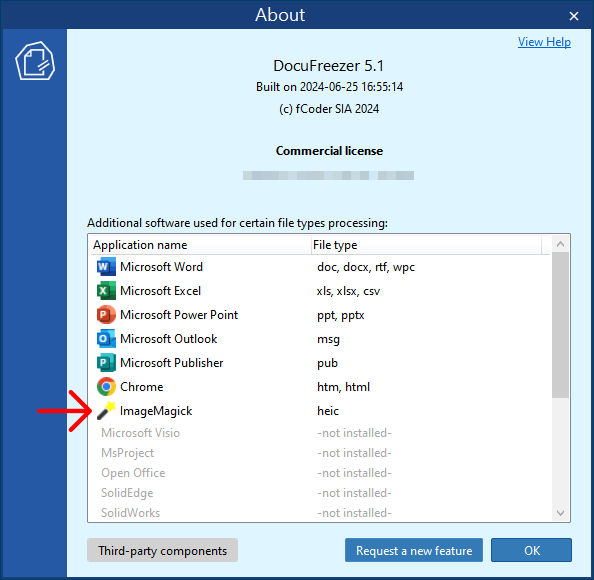
After installing ImageMagick on your system, you can confirm its installation by checking the Help menu. This can be found by clicking the "?" icon in the top right corner of DocuFreezer's main interface window.
How to install the codecs
Follow this instruction: How to install HEIF and HEVC codecs
Adjusting the quality of the output JPEG images
In most situations, you don't need to change any DocuFreezer settings to batch create JPEG images out of HEIC photos. Just follow the four steps – add the files to the List of Documents, select Output file type: JPEG as file format, and press Start.
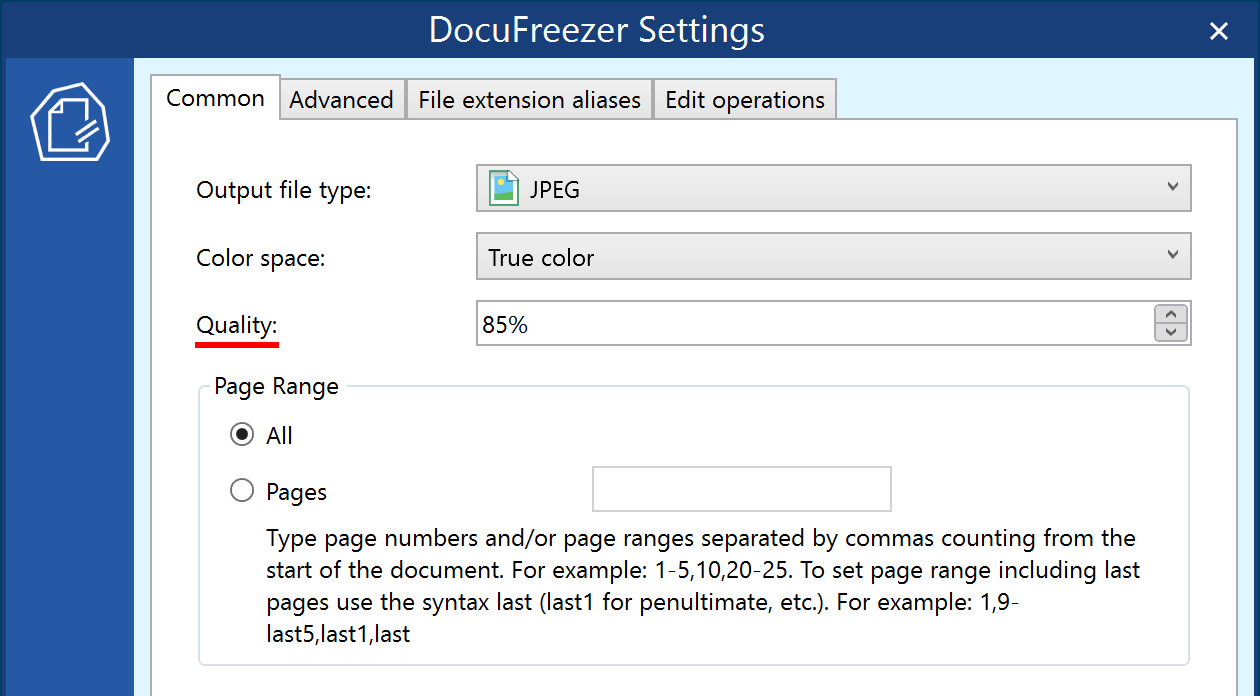
However, for the best quality vs. file size tradeoff, you may want to choose output file size or quality to produce better JPG files. To do it, change the Quality (85% by default) – you'll find this parameter in the Common settings.
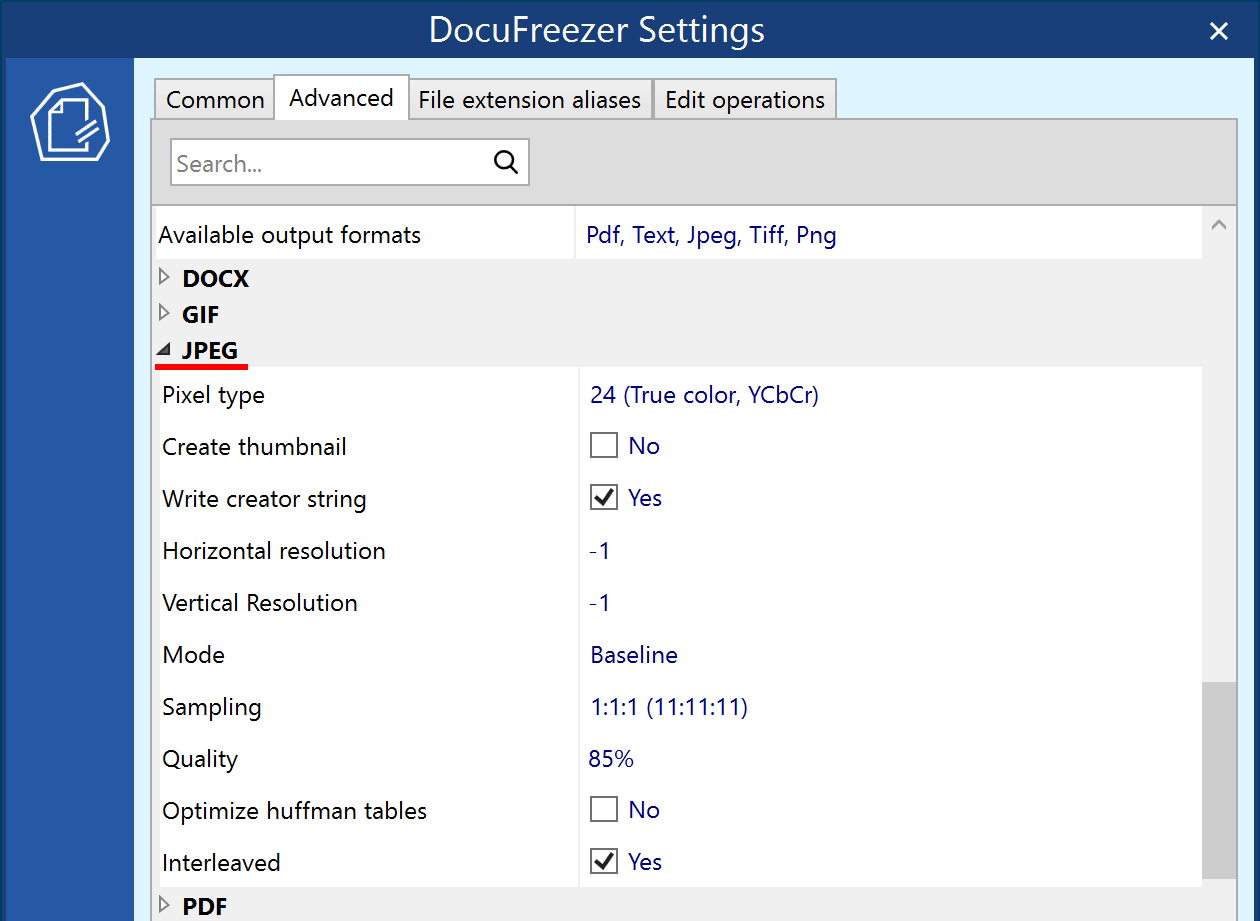
If you open DocuFreezer Advanced Settings, you may be overwhelmed by them at first glance. But for HEIC to JPEG conversion, it's worth checking only Available output formats > JPEG. If you want to fine-tune the output JPG images, there are plenty of options to choose from. Depending on your requirements, you can configure pixel type (color space), sampling, quality, Huffman tables optimization, compression mode, and other parameters.
Saving or removing EXIF metadata
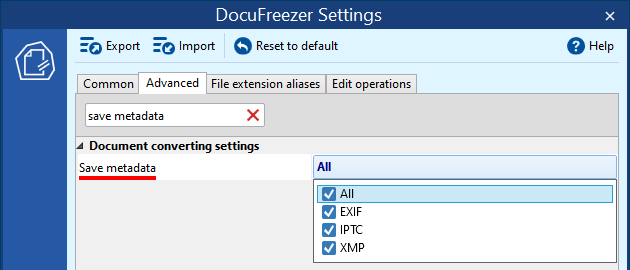
When converting HEIC files to JPEGs (or other file formats supported by DocuFreezer), you may notice that the original file metadata is missing after conversion. To preserve metadata like EXIF, IPTC, or XMP, enable all options for the Save metadata setting (Settings → Advanced settings → Save metadata) in DocuFreezer.
This setting lets you control whether to keep or remove file metadata. For example, if you want to remove some unnecessary data — such as date taken, GPS coordinates, or author's name — disable all options or change them as needed when converting photos.
Batch print HEIC files with Print Conductor
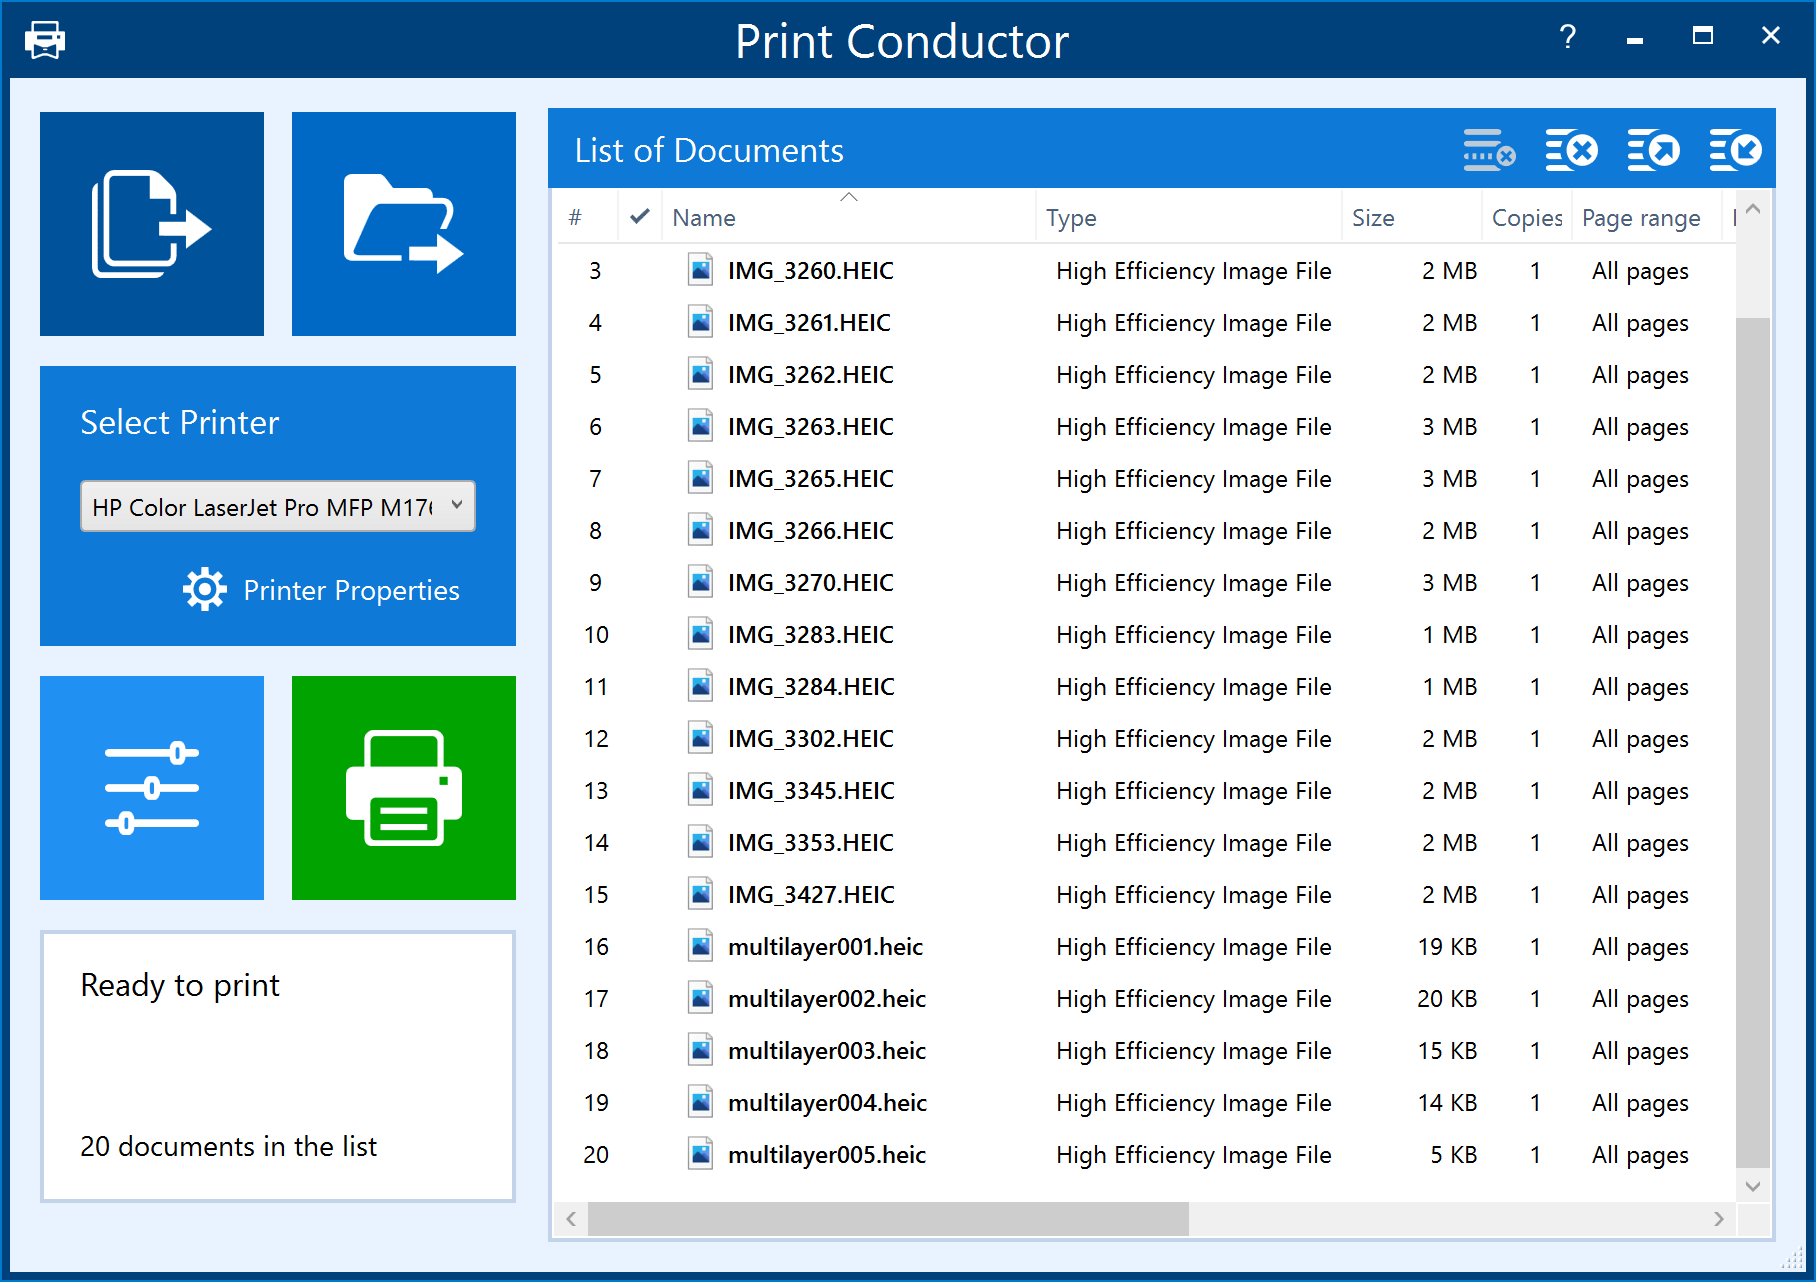
You can batch print multiple HEIC files the easy way with Print Conductor. Whether you’re printing to a virtual or 'normal' printer, just add several HEIC files to the program's List of Documents and press the Start Printing button.
Print Conductor can be especially handy if, along with the images, you also want to print documents like PDF or Word files or apply some additional settings.
HEIC vs. JPEG
The disadvantage of HEIC is that it’s not widely used beyond Apple devices. However, HEIC has a more advanced compression algorithm than JPG so that the photos will take up less disk space. Both of these formats have their perks, and you might need to batch convert HEIC to JPEG because the latter is still the most commonly used file format.
What is HEIC?
HEIC (High-Efficiency Image Container) is Apple’s proprietary version of the HEIF or High-Efficiency Image File format. HEIC format is a file used to store images and videos on Apple’s devices like iPhone or iPad. It is related to the HEIF (High-Efficiency Image Format) standard that stores high-quality images. This is a relatively new standard format for storing images on Apple's devices. Unfortunately, HEIC has no native support on Windows and Android platforms. So, to view or edit HEIC images on various devices, you might want to convert them to the JPG format first.
What is JPG?
JPG is a widely used image format supported by all operating systems, including Windows, iOS, Android, Mac, etc. The level of compression can be adjusted, which allows a selectable tradeoff between storage size and image quality. JPG typically achieves 10:1 size reduction with little visible loss in image quality. The format is almost 30 years old.
| HEIC | JPEG |
|---|---|
| Developed by Moving Picture Experts Group (2015) | Developed by Joint Photographic Experts Group (1992) |
| Not widely compatible with apps or devices other than Apple's | Tried-and-true format opened and accepted on most devices and apps |
| Next-gen file compression offering even better compression (compared to JPEG) while preserving image quality | Widely used in web publishing thanks to lossy image compression technique |
| Capable of storing images and animations (image sequences, "live photos"). HIEC can store batches of images at a time, just like GIF. | Capable of storing images only |
| File size roughly 2 times less than JPEG. HEIC files are typically smaller than average JPG or PNG files. | Relatively small file size |
| Supports 16-bit color | Supports 8-bit color |
How to view HEIC photos on a Windows computer
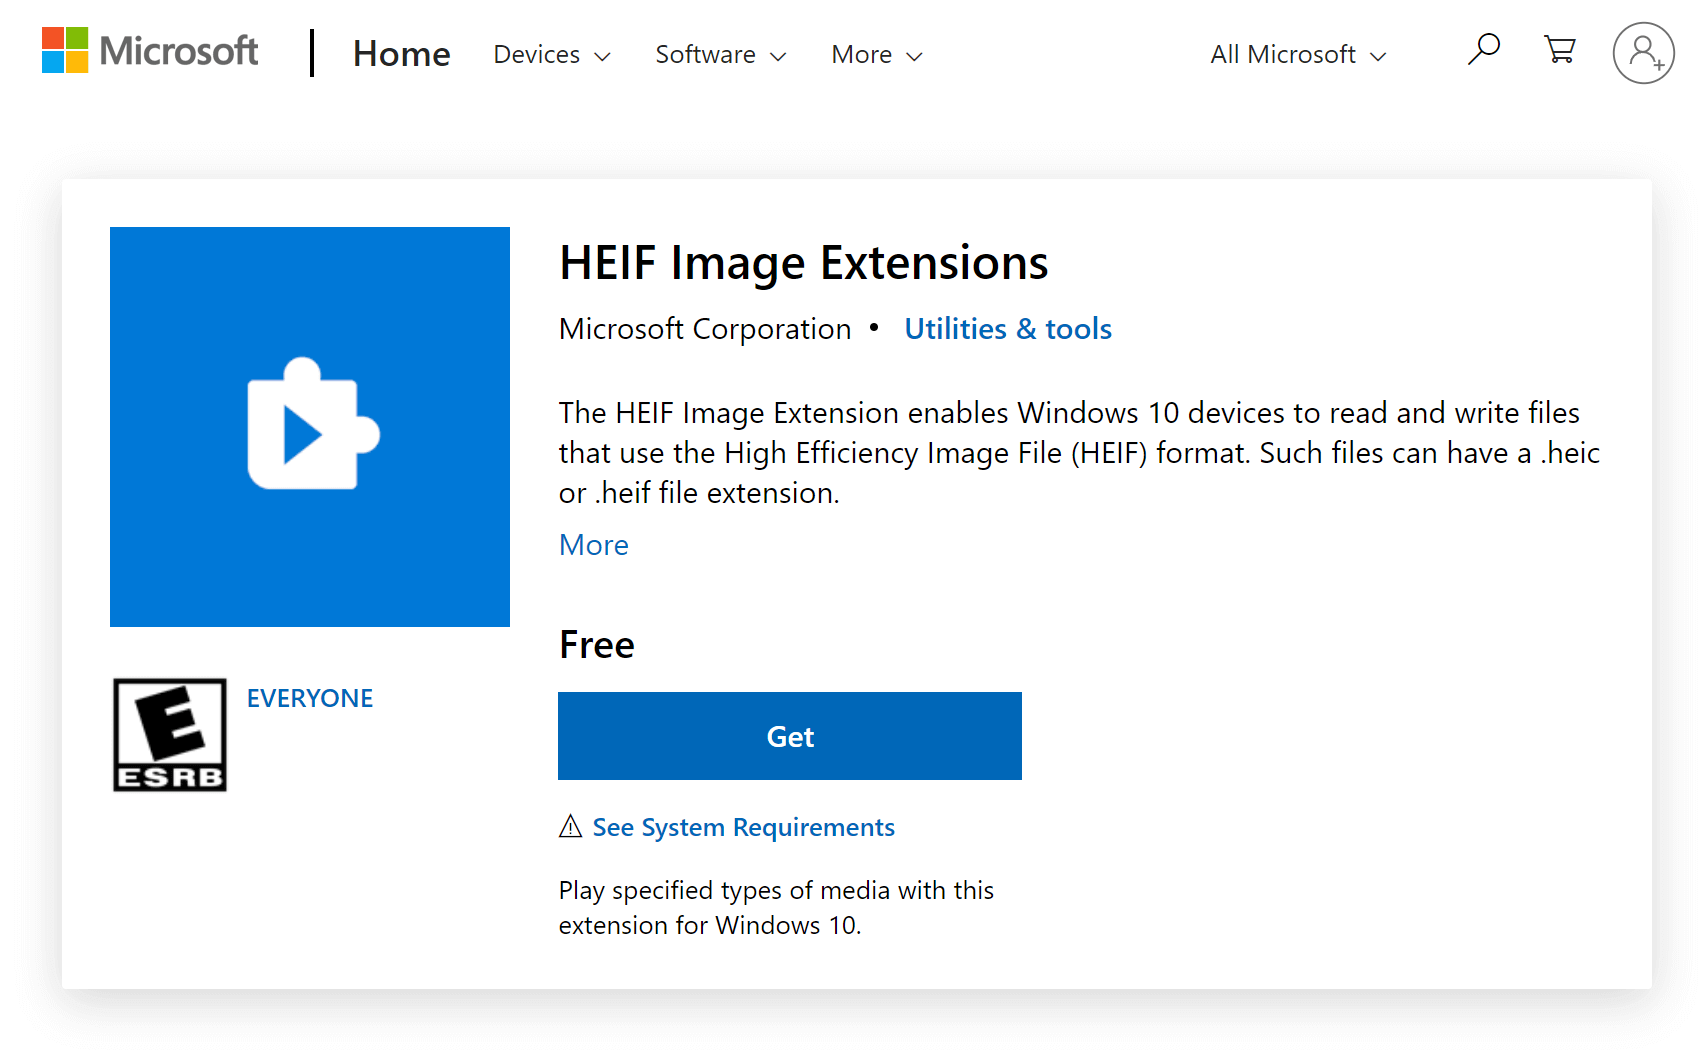
Microsoft has released a codec called HEIF Image Extensions, which will allow you to view and open HEIC files. Once you have it installed, your system will see HEIC photos just like any other image file. But the codec is only available for Windows 10/11, so if you’re running an older OS, then you’ll need to use a file converter to convert your images.
Windows 10 and 11 allow native support for HEIF files on Windows Photos. The feature is not enabled by default, and the Windows Photos app provides a link to a paid extension in the Microsoft store. The extensions would cost $0.99 (it is a one-time purchase). After installation, you can view HEIC images on a Windows 10/11 PC. Installing both these extensions is required; having a HEIC file extension alone without HEVC extension would fail to view HEIC images (HEIC and HEIF are based on High Efficiency Video Coding (HEVC)).
How to install additional codecs
Now you know how to turn multiple HEIC files into JPEGs. You can try out the trial version of DocuFreezer and see if it works for your tasks.
How to Print HEIC Photos
